Projects
Your designs are stored in the cloud as Projects. There are Public and Private projects.
Public projects can be accessed by any user. Users can like them or even load and edit them. Of course the edits will be saved as copies in separate projects, without affecting the original.
Private projects can only be accessed by the user who created them.
Every new project is always saved as Public. Any user can create unlimited Public Projects. Only Pro users can switch their Public projects to Private.
To access the projects menu you need to open the main menu (K) and then choose 'Projects'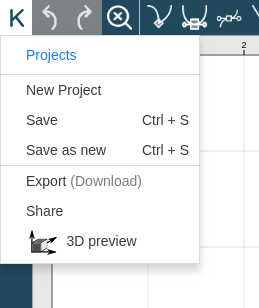
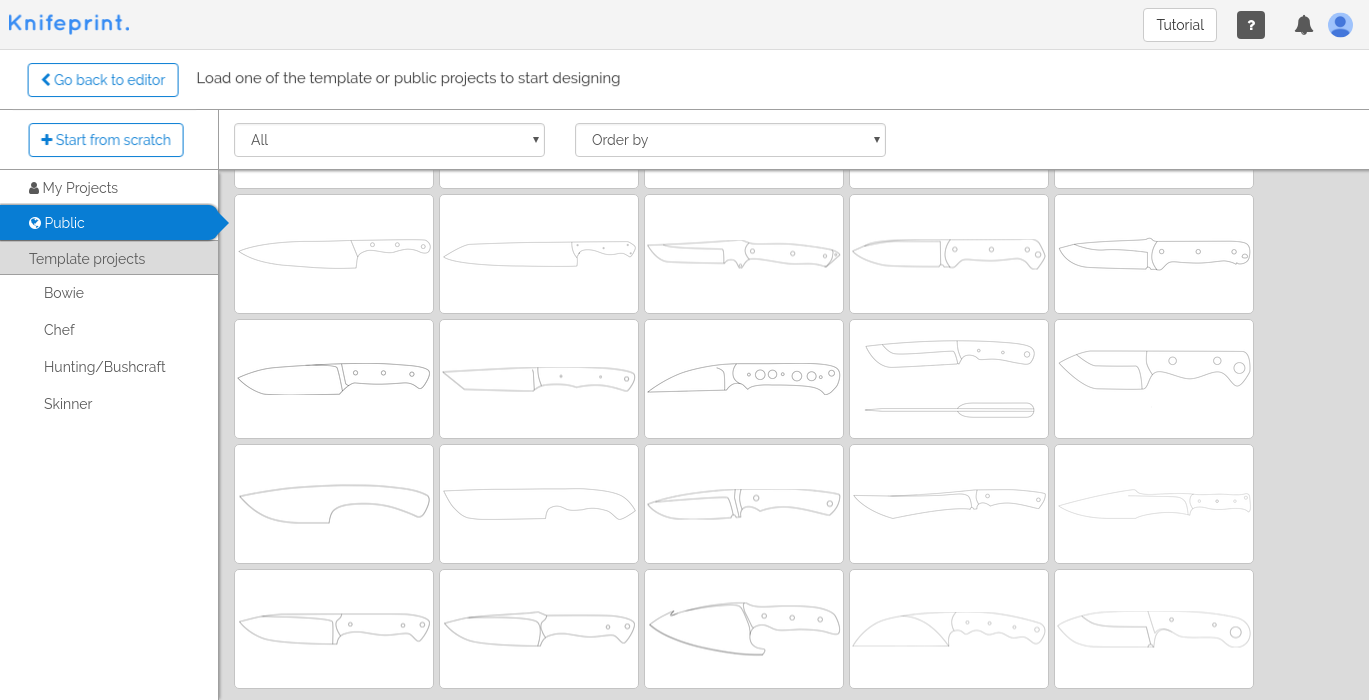 This is the Projects menu. From the sidebar, you can choose to view your own projects, Public or Template projects.
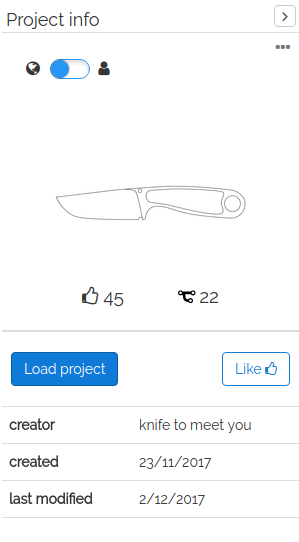
After selecting a Public or one of your own projects, the Project Info menu appears on the right side of the screen.
From there you can switch the project between Public and Private, load the project, and like it. You can also delete it if it is one of your own projects.
On the Project info tab you can also see how many likes and copies a project has, as well as the user who has created it, when it was created and when it was last modified.
Creating a new Project
To create a new project you need to first define the outline of the profile of the knife with the bezier tool. Start from anywhere and begin drawing the outline by clicking wherever you need to add a node. (You can add curves later with the select tool.) To complete the outline click at the point where you started.
Using the Trace Image feature
To get started, click the ‘K’ in the top left corner and choose ‘Trace Image’. A window will appear, from which you can select the image you wish to use. Only .jpg | .jpeg | .png files are compatible. Having selected the image, you can begin tracing your design with the bezier tool, following the procedure of creating a new project as described in the previous section. You can continue using the image to trace any extra bezier curves or drill holes. When you are done click the ‘Clear background image’ button on the top right of the screen next to the ‘3D Preview’ button, to remove the image and continue using the Knifeprint Editor.